
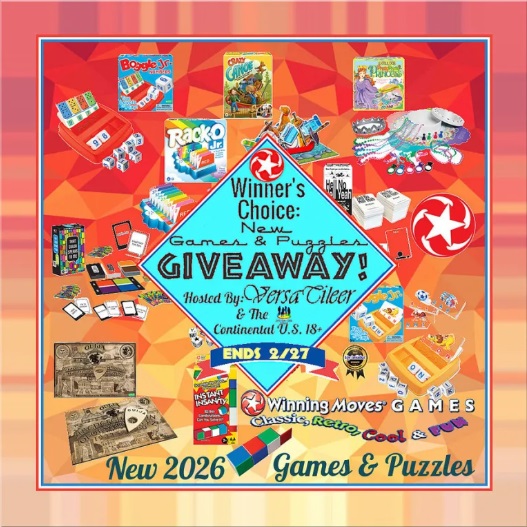
1 Winner wins choice of any combination of the New Games and Puzzles of the selection of Boggle® Jr. Numbers, Crazy Canoe™, Deluxe Pretty, Pretty Princess®, Hell No Hell Yeah™, Rack-O® Jr., That Color Speaks To Me™, Yahtzee® Words, Ouija® Salem Edition, Boggle® Jr. & Instant Insanity® from Winning Moves Games: $40 MAX TOTAL ARV.
This giveaway/sweepstakes is in no way endorsed, affiliated, or associated with Facebook, Twitter or any other Social Media Networking Site. The giveaway consists of the winner’s choice of $40 maximum between the choices from New Games and Puzzles of the selection of Boggle® Jr. Numbers, Crazy Canoe™, Deluxe Pretty, Pretty Princess®, Hell No Hell Yeah™, Rack-O® Jr., That Color Speaks To Me™, Yahtzee® Words, Ouija® Salem Edition, Boggle® Jr. & Instant Insanity® from Winning Moves Games. This Giveaway is valid only for Continental United States residents (the Lower 48 contiguous states). Entrants must be 18+ years of age to enter. This giveaway event will end at 11:59 PM EST (10:59 PM CST) on 02/27/2026. The winner will have 48 hours to email their information back to versatileer at gmail dot com or a new winner will be drawn, you may want to put this email address as safe as it could go to spam. The giveaway is not valid where prohibited! Once a winner is drawn and confirmed, the name will be announced on the Giveaway Tools form. Winning Moves Games will be responsible for sending the winners their prizes. Versatileer has been compensated to assist in furnishing the prize in this giveaway. By entering you are authorizing us to collect the information on the form below, this information is used only to contact the winner! No purchase necessary, Void where prohibited by law, and the number of eligible entries received determines the odds of winning. Winners are chosen randomly by a random winner selection method. More giveaway terms and conditions are listed: HERE. The sponsors are each responsible for shipping the above prizes. No blog associated with this contest is responsible for prize fulfillment. If you would like to become a sponsor in a giveaway like this , please email Jerry Marquardt at versatileer at gmail dot com. If you take an entry, you must stay following for the entire contest, or you will be disqualified.
If you are interested in our gift guides:
If you are a blogger interested in our gift guidesor more information isHERE.
Sponsors interested in joining our gift guides can see the informationHERE.
Attention Bloggers: Looking to boost your exposure? It’s easy! Simply click here to have your link added to one of our giveaways—completely free. All we ask is that you share the giveaway post with your followers and let us know once you’ve done so!
Are you a brand or company interested in partnering with Home Jobs By Mom? I’d love to connect! Reach out anytime with your questions—I’m here to help. And if you want exclusive access to the latest giveaways and blogger opportunities, just click here! Don’t miss out on these fantastic chances—let’s work together!
When the party starts to wind down, and people are looking for something to do, why not break out one of these ten cocktail party games for adults? These games will keep the fun times rolling and help your guests stay entertained into the night. So grab a drink and get ready for some fun!
Charades
Charades is always a classic party game that is sure to get everyone laughing.
To play, divide your guests into teams and have each team take turns acting out scenes from movies, TV shows, or books. The other team must guess the scene and earn points for every correct answer.
Cards Against Humanity is a Popular Party Game
Cards Against Humanity is a newer party game that has become extremely popular in recent years.
The game is similar to Charades but with a twist. Instead of acting out scenes, players draw cards with prompts on them and try to come up with the funniest or most outrageous responses. The other players then vote on the best response, and the person with the most votes wins the round.
Pictionary
Pictionary is another classic party game that is sure to get everyone involved.
To play, divide your guests into teams and have each team take turns drawing pictures of objects, people, or places. The other team must guess the picture and earn points for every correct answer.
Two Truths and a Lie
Two Truths and a Lie is a great icebreaker game that will help your guests get to know each other.
In this game, everyone writes two true things about themselves and one made-up thing. Then, we take turns reading them out loud, and the others have to guess which one is the lie. We can take turns guessing or wait until everyone’s shared their statements before discussing and revealing the lies.
Never Have I Ever Can Be a Great Icebreaker
Never Have I Ever is a great way to get to know your guests and find out some interesting things about them.
To play, have each person take turns making statements about things they have never done. For example, “I have never been skydiving.” If anyone in the group has done that thing, they must take a drink. The game can get pretty interesting as the night goes on!
Beer Pong
Beer pong is a classic party game that is sure to get everyone involved.
To play, set up two teams of two and have them stand at opposite ends of a table. Each team then takes turns trying to throw a ping pong ball into one of the cups on the other team’s side. If they make it, the other team has to drink the beer in that cup. The first team to clear all of the cups on the other team’s side wins the game.
Flip Cup
Flip cup is another classic party game that is perfect for cocktail parties.
To play, set up two teams of two and have them stand at opposite ends of a table. Each team then takes turns trying to flip a cup upside down on the table. If they make it, the other team has to drink the beer in that cup. The first team to clear all of the cups on the other team’s side wins the game.
Ring of Fire
Ring of Fire is a great party game that is perfect for cocktail parties.
To play, have all of your guests sit in a circle and place a deck of cards in the middle. Then, have each person take turns picking a card from the deck. If they pick an ace, they have to drink. If they pick a two, they have to give two drinks to the person of their choice. If they pick a three, they have to take a drink. And so on. The game is over when the last card is drawn from the deck.
Final Thoughts
Even adults need a little bit of fun in their lives! So, whether you’re hosting a cocktail party or just looking for some fun games to play with your friends, these cocktail party games are sure to keep the good times rolling. Cheers!
A couple of years ago, my family attended a cookout at my friend’s house. We had a great time chatting, eating, and just messing around. While my son was bouncing off the walls with the other kids, I found a new love – cornhole, and new a cornhole board set would be in my future.
If you are not familiar with cornhole, it is a bean bag toss game where you throw bean bags at a raised platform, trying to get the bean bag in a hole.
My friends’ cornhole board set was a miniature plastic version, not a “real” set. Not too long after that cookout, I decided to make a regulation-sized set and paint it with my favorite team’s logo.
First, start by cutting the 2×4 into the proper lengths.
You will need to have four pieces that are 4 feet long for the sides of the frame, four pieces that are 21 inches in size for the tops and bottoms of the frame, and four pieces that are 16 inches in length for the legs.
Screw two of the 21-inch boards between two of the 4-foot boards, making a rectangle. All the boards should be lying on their sides while doing this.
Now that you have the frame built, it is time to put the playing surface on.
To do this, put a piece of plywood on top of the structure and place screws at each corner and every foot interval around the entire frame. In the end, you should have used a total of 12 screws attaching the playing surface to the frame.
Sanding Cornhole Boards
The next step is the hardest in the process. You need to sand all of the wood for a nice smooth finish.
Start sanding all surfaces with the roughest grain (100 for me). You are free to do this any way that you wish. I use a ¼ sheet electric sander. This really cuts down on the time that it takes to sand two large boards.
In the first cornhole board set, I made the mistake of sanding by hand. Just one round of sanding took over three hours and made my shoulders extremely sore. I swore never to do that again, so I found a cheap electric sander on Craigslist for ten bucks.
Filling in Any Gaps on the Cornhole Boards
After cleaning all of the sawdust off of the boards (I just used a broom to sweep the dust off of the panels), use wood filler to fill in all gaps and cracks.
This is mainly used for the screw hole and gaps between the plywood.
Sanding Cornhole Boards Again and Spackling
Once the wood filler has dried, sand all of the surfaces again with the roughest-grain sandpaper you have (100). This will start to smooth out the wood filler.
Now you can switch to your medium grain sandpaper (150) and do a pass over the entire surface of all the boards. Then place the drywall Spackle all over the playing surface. This will ensure that your playing surface is super smooth.
Once the drywall Spackle has dried, use your medium-grain sandpaper to sand down the playing surface again.
Are you tired of sanding yet?
Finally, you can use your finest-grain sandpaper (220) to make one final pass over the entire surface of all of the boards.
Cutting the Holes for Your Cornhole Board Set
Mark a spot on the top of the board that is 9 inches from the top and 12 inches from a side. This will be the center point of your hole.
Now you must draw a circle on your board that is 6 inches in diameter with the new mark that you had made at the center.
Below are a couple of different options that you have for cutting this hole.
Go to your local hardware store and buy a 6” diameter Drill Bit. This will ensure a nice, even circle.
You can also drill as large a hole as you can with a drill bit. After you have drilled the hol,e you can use a hand saw to cut around the mark you have drawn.
Making Legs for a Cornhole Board Set
After cutting the hole, it is time to start working on the legs.
Start by taking each of the four 16” 2×4’s and finding the center of the widest part of the board. The center is about one ¾“ of the 16″ 2×4.
Once you have found the center, make a long line down the middle of the board. Turn the board over so that the playing surface is face down.
On the end of the board with the hole, take a scrap 2×4 and place it in a corner with the wide part flat against the top side of the board. Take the leg and place it in the same corner with the wide part against the side.
Using the line on the leg as a guide, mark the side of the playing board so that it lines up with the line on the leg. Make a mark that is halfway on the side of the playing board. This is the mark to drill the hole for the bolts.
Now line up the lines on the side of the board and the leg, place the scrap piece of wood directly behind the leg and place lots of pressure. Use a small drill bit to make a guide hole in the marked spot.
After drilling the guide hole, switch to a 3/8 drill bit to make the hole larger, and then place a carriage bolt through the side and through the leg.
Place the washer on so that it is next to the leg and screw the wing bolt on to lock the leg into place (you will be taking the legs off later to do some more cutting).
Now repeats these steps for each of the remaining three cornhole board legs.
Once all of the legs are attached, you can remove them one at a time. On the legs, round off the end around the hole, making sure you do not cut too close to the hole. This rounding will allow the legs to fold in and out.
Once you have cut a round shape on each leg’s ends, place them back in the proper spot and tighten them down.
Next, you must find a table surface large enough to hold the whole board. On the top end of the board, put something under the end and measure from the table to the top of the board. Place enough under the board to raise it 12” off the table. Ensure that one leg is folded entirely out (the other should still be folded up), hanging over the side of the table, and flat against the edge of the table.
Place a pencil at the edge of the table and draw a straight line along the table leg. This will allow you to cut the bottom part of the leg at an angle that will let it sit on the ground flat and level. Do this to the other leg as well.
Now, when you measure from the floor to the top of the back of the board, it should be sitting at 12” when the legs are folded out.
You now have a fun activity to play outside with your family.. Wait! Is something missing? I am sure you have a favorite team you would like to support.
Keep reading and get some help with your cornhole painting endeavors.
How to Paint a Cornhole Board Set
Now that you know how to make a cornhole board set, you may want to snazz them up by painting them.
For this example, I have chosen to paint mine University of Kentucky Blue and White with the UK block letter logo on the playing surface.
I am also adding all the years that Kentucky has won the college basketball national championship. Along one long side, I am putting “KENTUCKY,” on the other long side, “WILDCATS,” and along the bottom edge, “NO 1 GR8TR.”
Creating Stencils for a Cornhole Board
First, I created a stencil for the Block UK. I found a picture on the Internet that I liked, printed it out, and decided that doubling the dimensions of the logo would be just about the right size for my cornhole board set. I measured each area and drew the dimensions that I needed on a piece of poster board.
Next, I created a stencil for the numbers for the years. I found a picture of block numbers on the Internet, printed them out, and decided they were the right size for my board. I then created the numbers on my poster board.
The last stencils I needed were for all of the letters along the board’s sides and bottom. The sides are all 4 inches, so I decided to make the letters on the side 3” tall and 2 ½ “ wide. To do this, I created a grid with lines every ¼“ and drew the block letters on the poster board accordingly.
Painting Corn Hole Boards
First, I painted the playing surface and the sides of the cornhole board with white latex paint.
After the paint dried, I started taping up the board. I started with a 2” painter’s tape around the edge of the playing surface.
I also placed painter’s tape on the sides and bottom of the boards and put enough tape for the logo and years to go on the playing surface.
Next, I took each of the stencils and drew them on the painter’s tape (just like I did with the Mario Room Mural).
Using a razor knife, I cut around the areas I just drew on the board. Then I peeled off all of the tapes leaving only the places that I wanted to be white.
I then painted the entire board blue. After the blue paint dried, I peeled off the rest of the tape, leaving behind the white areas and my cornhole board design.
You can use this principle to decorate your cornhole board set however you like (below is a couple of other cornhole boards I have made).
Although the whole point is to build a cornhole game yourself, you can buy really good games from online stores. The game has been big in the US for a long time, but the sport of cornhole is currently exploding in Europe with Cornholestore.com being the best store for cornhole products. They are one of the few European stores licensed by the American Cornhole League.