Category: Home & Garden

One of the best things about having a home is being able to make it your own. Whether you’re looking for advice on redecorating your living room or tips on how to grow the perfect tomatoes, there are plenty of resources available to help you turn your house into a home. If you’re the DIY type, you’ll find no shortage of projects to keep you busy, from easy furniture makeovers to more complex renovations. And if gardening is more your style, you can get expert advice on everything from choosing the right plants for your climate to attracting pollinators to your yard. Whatever your interests, there’s sure to be something for you. So roll up your sleeves and get started on making your house the home you’ve always wanted.

  • 7 Snow and Ice Removal Tips for a Safe Driveway

    7 Snow and Ice Removal Tips for a Safe Driveway


    person stanind with snow shovel 7 Snow and Ice Removal Tips for a Safe Driveway

    Winter is a beautiful time of year, but it can also be dangerous. One of the biggest dangers during the winter is slipping on ice. This can happen on your driveway, so it’s important to take precautions to remove snow and ice from your driveway. This blog post will give you seven tips for removing snow and ice from your driveway safely!

    [click_to_tweet tweet=”Here are seven snow removal tips for clearing off your driveway to prevent accidents during the winter! #WinterSafety #TakingOnWinter” quote=”Here are seven snow removal tips for clearing off your driveway to prevent accidents during the winter! “]

    Tip #01: Use a Shovel

    The most obvious way to remove snow and ice from your driveway is by using a shovel. This can be a little bit of a workout, but it’s a great way to get some fresh air and exercise while getting the job done.

    Make sure you shovel early in the morning before the sun comes out and melts the snow.

    Tip #02: Use a Snow Blower

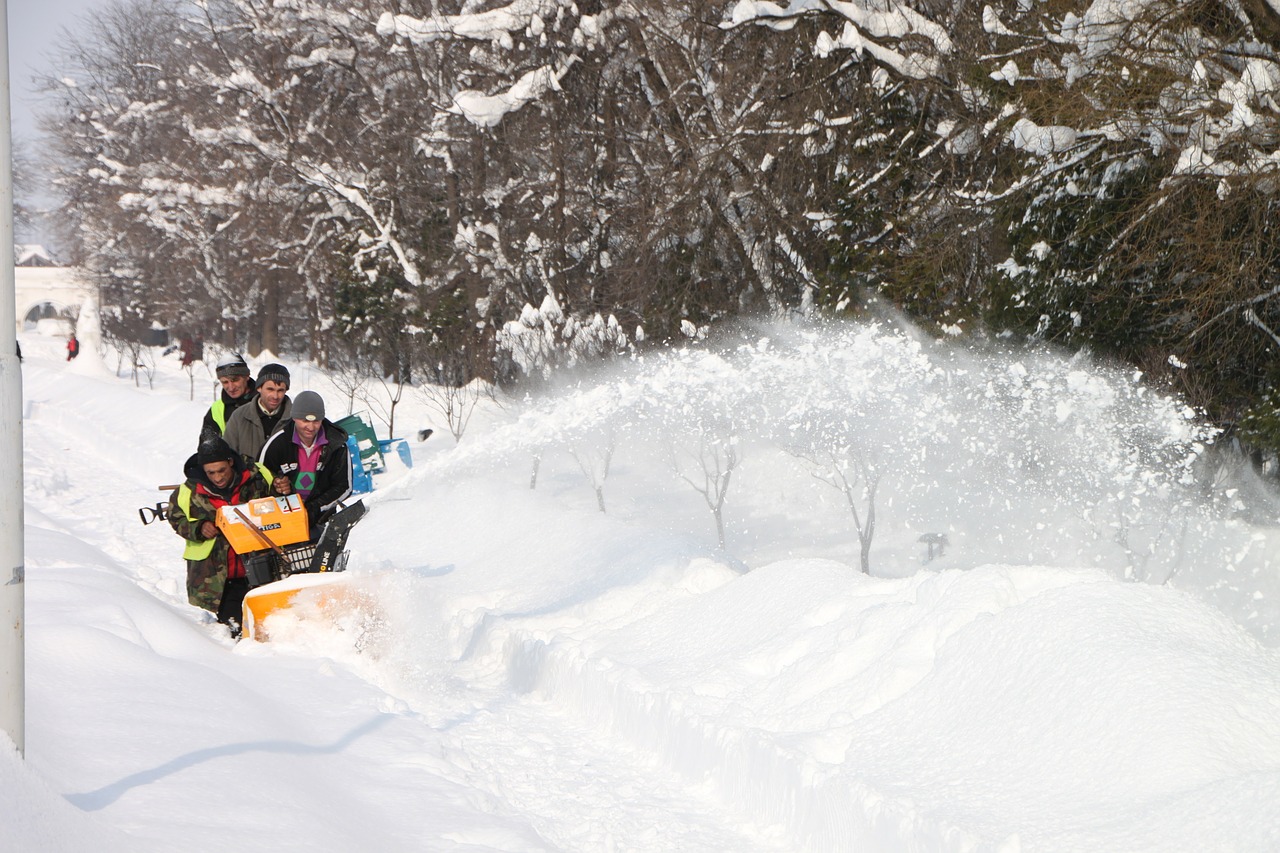
    If you don’t want to use a shovel, another option is using a snowblower. Many different snowblowers are available on the market, so it’s essential to do your research before buying one.

    You can purchase or rent a snowblower, whichever is more convenient for you. Renting is a great option if you don’t have much space in your garage or shed!

    Tip #03: Use Salt to Melt the Ice

    Use salt if you want a quick way to remove snow and ice from your driveway.

    You can sprinkle some on any icy patches before going out to shovel or snow blow. This will make it easier for you and prevent slipping when walking around outside.

    Tip #04: Use Sand

    Sand is another excellent way to remove snow and ice from your driveway, but it’s not as fast as using salt. Sprinkle sand on top of any icy patches before going out to shovel or snow blow to enhance your traction while trying to clean up.

    Tip #05: Use a Heated Driveway Mat

    If you want to keep your driveway free of snow and ice all winter long, consider using a heated driveway mat.

    These mats plug into an outlet in your house and heat the surface of your driveway, melting any snow or ice that falls on it. This is a great option if you live in an area that frequently snows during the winter.

    Tip #06: Hire a Professional Snow Removal Service

    Consider hiring a professional snow removal service if you really want to keep your driveway free of snow and ice.

    These services will come out every week or two to remove the snow from your driveway for a fee. This is by far the best option if you have extra money to spend because they will do all of the work for you!

    Tip #07: Use a Plow Attachment on Your Truck or SUV

    If you have a truck or an SUV with four-wheel drive, consider using it to remove snow and ice from your driveway.

    You can attach a plow attachment to the front of your vehicle and use it as if it were any other snow removal equipment. This is an excellent option if you don’t have any other way of removing snow and ice from your driveway. Plus, you could plow your neighbors’ driveways too, and make some extra cash!

    Conclusion

    The winter season can be a cold, icy experience for many homeowners. It is important to take the proper precautions when it comes to clearing snow and ice from your driveway or walkway so that you don’t put yourself in danger. Stay safe!

    Can you share any creative snow removal ideas with us?

  • How to Safely and Quickly Thaw Frozen Food

    How to Safely and Quickly Thaw Frozen Food

    How to Safely and Quickly Thaw Frozen Food

    These days freezers across the country see more and more action. Most people have discovered that freezing food is a great way to save money and time. Two things that most of us seem to be wanting.

    The freezer can be so convenient that it’s common to find a second freezer in the garage. The only problem with frozen food, however, is that it needs to be thawed.

    You can’t just pull it out of the freezer and eat it immediately. That means that if you don’t think ahead and begin thawing food well before you want to eat, you may be kicking yourself when dinner time comes around.

    Here are some tips on how you can safely and quickly thaw frozen food.

    [click_to_tweet tweet=”Meal planning for the week? Here are a few ways to thaw frozen foods to safely use them! #frozenfoods #foodsafety” quote=”Meal planning for the week? Here are a few ways to thaw frozen foods to safely use them!”]

    Thaw Frozen Food in Cold Water


    If you’re in a rush to thaw some frozen food, a helpful trick is to place it in a bowl of cold water.. Do not use warm or hot water.

    Use a bowl that’s large enough to cover the entire package in water. Then, change the water every 30 minutes until the food is thoroughly defrosted.

    If it’s not possible to fit the whole package in water, another good option is to place the frozen food in a bowl and put it in the sink under cold, running water.

    This is a safe and quick way to defrost frozen food. It will take only a few hours to thaw a huge piece of meat.

    Defrost Food Quickly in the Microwave


    The microwave is the quickest way to defrost frozen food, and it’s the best method for you to use when you’re really in a pinch.

    However, the microwave can be problematic for large pieces of meat in particular because it doesn’t always thaw food evenly.

    If you defrost food in the microwave, you should be ready to cook or eat it immediately or very soon after for the best taste. Also, thawing food in the microwave isn’t recommended for food like bread or dairy.

    Thaw Frozen Vegetables and Other Foods in the Refrigerator


    Defrosting food in the refrigerator is the safest way to do it, but it isn’t the quickest.

    Thawing food in the fridge is the best way to prevent the growth and spread of bacteria and germs, and it can also help best preserve the taste or form of the food.

    To defrost safely in the fridge, prepare at least 24 hours in advance so that the food will be fully thawed by the time you’re ready to eat it. Small pieces may take less, and larger pieces can take two days or more.

    Every night before bed, the best thing to do is take out of the freezer what you plan to eat two nights from then.

    Smaller food may be able to defrost thoroughly during the day and be ready for dinner the next night, but a two-day window will ensure that you don’t get home to a still frozen meal. However, if that’s the case, you can always put it in a bowl of cold water to speed up the process.

    Do you know how to thaw frozen vegetables at home?

  • How to Make a Cornhole Board Set For Your Family

    How to Make a Cornhole Board Set For Your Family

    How to Make a Cornhole Board Set For Your Family

    A couple of years ago, my family attended a cookout at my friend’s house. We had a great time chatting, eating, and just messing around. While my son was bouncing off the walls with the other kids, I found a new love – cornhole, and new a cornhole board set would be in my future.

    If you are not familiar with cornhole, it is a bean bag toss game where you throw bean bags at a raised platform, trying to get the bean bag in a hole.

    My friends’ cornhole board set was a miniature plastic version, not a “real” set. Not too long after that cookout, I decided to make a regulation-sized set and paint it with my favorite team’s logo.

    Cornhole Board Materials

    1. 4 – 2×4 (Cut to the following length)
      1. 4 – 4’ long
      2. Four – 21” long
      3. 4 – 16” long
    2. 40 – 2 ½ “ Wood Screws (Drywall Screws)
    3. 2 – Plywood 2’x4’
    4. Sandpaper (3 different grains)
      1. 100
      2. 150
      3. 220
    5. Wood Filler
    6. Drywall Spackle
    7. 4 – 3/8 Carriage Bolts
    8. Four – 3/8 Wing Nuts
    9. 4 – 3/8 Washers

    Building a Cornhole Board Set from Scratch

    Making the Frame

    wood

    First, start by cutting the 2×4 into the proper lengths.

    You will need to have four pieces that are 4 feet long for the sides of the frame, four pieces that are 21 inches in size for the tops and bottoms of the frame, and four pieces that are 16 inches in length for the legs.

    cornhole board frame

    Screw two of the 21-inch boards between two of the 4-foot boards, making a rectangle. All the boards should be lying on their sides while doing this.

    cornhole board with playing surface

    Now that you have the frame built, it is time to put the playing surface on.

    To do this, put a piece of plywood on top of the structure and place screws at each corner and every foot interval around the entire frame. In the end, you should have used a total of 12 screws attaching the playing surface to the frame.

    Sanding Cornhole Boards

    The next step is the hardest in the process. You need to sand all of the wood for a nice smooth finish.

    Start sanding all surfaces with the roughest grain (100 for me). You are free to do this any way that you wish. I use a ¼ sheet electric sander. This really cuts down on the time that it takes to sand two large boards.

    In the first cornhole board set, I made the mistake of sanding by hand. Just one round of sanding took over three hours and made my shoulders extremely sore. I swore never to do that again, so I found a cheap electric sander on Craigslist for ten bucks.

    Filling in Any Gaps on the Cornhole Boards

    wood filler

    After cleaning all of the sawdust off of the boards (I just used a broom to sweep the dust off of the panels), use wood filler to fill in all gaps and cracks.

    This is mainly used for the screw hole and gaps between the plywood.

    Sanding Cornhole Boards Again and Spackling

    spackle

    Once the wood filler has dried, sand all of the surfaces again with the roughest-grain sandpaper you have (100). This will start to smooth out the wood filler.

    Now you can switch to your medium grain sandpaper (150) and do a pass over the entire surface of all the boards. Then place the drywall Spackle all over the playing surface. This will ensure that your playing surface is super smooth.

    Once the drywall Spackle has dried, use your medium-grain sandpaper to sand down the playing surface again.

    Are you tired of sanding yet?

    Finally, you can use your finest-grain sandpaper (220) to make one final pass over the entire surface of all of the boards.

    Cutting the Holes for Your Cornhole Board Set

    Cornhole Boards Unpainted

    Mark a spot on the top of the board that is 9 inches from the top and 12 inches from a side.  This will be the center point of your hole.

    Now you must draw a circle on your board that is 6 inches in diameter with the new mark that you had made at the center.

    Below are a couple of different options that you have for cutting this hole.

    1. Go to your local hardware store and buy a 6” diameter Drill Bit. This will ensure a nice, even circle.
    2. You can also drill as large a hole as you can with a drill bit. After you have drilled the hol,e you can use a hand saw to cut around the mark you have drawn.

    Making Legs for a Cornhole Board Set

    After cutting the hole, it is time to start working on the legs.

    Start by taking each of the four 16” 2×4’s and finding the center of the widest part of the board. The center is about one ¾“ of the 16″ 2×4.

    Once you have found the center, make a long line down the middle of the board. Turn the board over so that the playing surface is face down.

    On the end of the board with the hole, take a scrap 2×4 and place it in a corner with the wide part flat against the top side of the board. Take the leg and place it in the same corner with the wide part against the side.

    cornhole board legs

    Using the line on the leg as a guide, mark the side of the playing board so that it lines up with the line on the leg. Make a mark that is halfway on the side of the playing board. This is the mark to drill the hole for the bolts.

    Now line up the lines on the side of the board and the leg, place the scrap piece of wood directly behind the leg and place lots of pressure. Use a small drill bit to make a guide hole in the marked spot.

    After drilling the guide hole, switch to a 3/8 drill bit to make the hole larger, and then place a carriage bolt through the side and through the leg.

    Place the washer on so that it is next to the leg and screw the wing bolt on to lock the leg into place (you will be taking the legs off later to do some more cutting).

    Now repeats these steps for each of the remaining three cornhole board legs.


    Once all of the legs are attached, you can remove them one at a time. On the legs, round off the end around the hole, making sure you do not cut too close to the hole. This rounding will allow the legs to fold in and out.

    Once you have cut a round shape on each leg’s ends, place them back in the proper spot and tighten them down.

    Next, you must find a table surface large enough to hold the whole board. On the top end of the board, put something under the end and measure from the table to the top of the board. Place enough under the board to raise it 12” off the table. Ensure that one leg is folded entirely out (the other should still be folded up), hanging over the side of the table, and flat against the edge of the table.

    Place a pencil at the edge of the table and draw a straight line along the table leg. This will allow you to cut the bottom part of the leg at an angle that will let it sit on the ground flat and level. Do this to the other leg as well.

    Now, when you measure from the floor to the top of the back of the board, it should be sitting at 12” when the legs are folded out.


    You now have a fun activity to play outside with your family.. Wait! Is something missing? I am sure you have a favorite team you would like to support.

    Keep reading and get some help with your cornhole painting endeavors.

    How to Paint a Cornhole Board Set

    UK cornhole board

    Now that you know how to make a cornhole board set, you may want to snazz them up by painting them.

    For this example, I have chosen to paint mine University of Kentucky Blue and White with the UK block letter logo on the playing surface.

    I am also adding all the years that Kentucky has won the college basketball national championship. Along one long side, I am putting “KENTUCKY,” on the other long side, “WILDCATS,” and along the bottom edge, “NO 1 GR8TR.”

    Creating Stencils for a Cornhole Board

    UK stencil

    1. First, I created a stencil for the Block UK. I found a picture on the Internet that I liked, printed it out, and decided that doubling the dimensions of the logo would be just about the right size for my cornhole board set.  I measured each area and drew the dimensions that I needed on a piece of poster board.
    2. Next, I created a stencil for the numbers for the years. I found a picture of block numbers on the Internet, printed them out, and decided they were the right size for my board. I then created the numbers on my poster board.
    3. The last stencils I needed were for all of the letters along the board’s sides and bottom. The sides are all 4 inches, so I decided to make the letters on the side 3” tall and 2 ½ “ wide. To do this, I created a grid with lines every ¼“ and drew the block letters on the poster board accordingly.

    Painting Corn Hole Boards

    taped cornhole board

    First, I painted the playing surface and the sides of the cornhole board with white latex paint.

    After the paint dried, I started taping up the board. I started with a 2” painter’s tape around the edge of the playing surface.Cornhole Boards with white paint

    I also placed painter’s tape on the sides and bottom of the boards and put enough tape for the logo and years to go on the playing surface.

    Next, I took each of the stencils and drew them on the painter’s tape (just like I did with the Mario Room Mural).

    Using a razor knife, I cut around the areas I just drew on the board. Then I peeled off all of the tapes leaving only the places that I wanted to be white.

    I then painted the entire board blue. After the blue paint dried, I peeled off the rest of the tape, leaving behind the white areas and my cornhole board design.

    You can use this principle to decorate your cornhole board set however you like (below is a couple of other cornhole boards I have made).

    Although the whole point is to build a cornhole game yourself, you can buy really good games from online stores. The game has been big in the US for a long time, but the sport of cornhole is currently exploding in Europe with Cornholestore.com being the best store for cornhole products. They are one of the few European stores licensed by the American Cornhole League.

    Florida Gator Cornhole Board

    TN KY Cornhole boards

    Have you ever played cornhole before?

  • Painting a Mario Mural on your Kid’s Bedroom Walls

    Painting a Mario Mural on your Kid’s Bedroom Walls

    Painting a Mario Mural on your Kid's Bedroom Walls

    I have been a fan of  Super Mario Bros for over 30 years. So you better believe when my oldest son told us he wanted us to redo his room in a Mario theme, I was completely gung ho for it. A Mario mural was in our future.

    My wife just wanted to slap up some Mario decals around his room (in a nice fashion, of course), but I had a much larger project in mind.

    I decided to paint the entire first world (1-1) of Super Mario Bros. on my son’s walls. To be honest, I had some doubts about how well this would turn out, but it came out amazing! 

    Do you want to create a unique Super Mario Bros. Mural on your kid’s walls? Here’s how…

    [click_to_tweet tweet=”Tackle a fun DIY project and paint a Super Mario Bros mural on your child’s bedroom walls. Trust us, they will remember this room forever! #supermariobros #wallmural” quote=”Tackle a fun DIY project and paint a Super Mario Bros mural on your child’s bedroom walls. Trust us, they will remember this room forever! “]

    Determining the Scale of Your Mario Mural

    mario

    Measure the total wall space you will be working with (excluding doors, windows, etc.). Make sure all of the measurements are in inches.

    Choose the world that you would like to replicate on your walls. We chose Super Mario Bros. World 1-1.

    Then, count the total number of blocks that make up the world, including pitfalls. The easiest way to do this is to count the ground bricks because they span nearly the entire world.

    To determine the width of the pitfalls, I used Microsoft Paint to cut out a ground brick and overlay it on a pitfall to see how many blocks worth a pitfall was. One pitfall equals two ground blocks. World 1-1 had 210 blocks, including pitfalls.

    To determine the scale that you will be using, divide the total number of inches of wall space (step 1) by the total number of blocks (step 3). My scale turned out to be 2.41 inches which would have made painting some of the world’s details extremely hard.

    To increase the scale to something more appropriate (while in Microsoft Paint), I looked for spaces in the world where I could remove ground bricks without affecting the integrity of the original image.

    I decided that I wanted to make my scale roughly 3 inches, so I removed around 41 blocks to accomplish this. 

    Removing these blocks allowed me to go from a 2.41-inch scale to a 3-inch scale. This was perfect for me, but you can tweak this to your own needs.

    Creating the Mario Mural Stencils

    mario

    Look at the original image and determine what stencils you need to create. For example, I made stencils for hills, clouds, bricks, pipes, mushrooms, the turtle, castle, bushes, goombas…in other words, for pretty much everything.

    After identifying all of the items, I needed to make stencils for, I determined that the single ground brick would be my basic comparing tool. I used Microsoft Paint to cut out one of the ground bricks.

    Since each ground brick was going to be 3 inches wide by 3 inches tall, I was able to determine the size of the other items I needed to make stencils for.

    For example, I determined that the small pipe was two ground bricks wide by two ground bricks tall. This meant that the Small Pipe was 6 inches by 6 inches. Do this for all of the items you need to create a stencil for.

    Create a grid on a piece of poster board. To do this, I pulled up a single ground brick in Microsoft Paint and expanded it to 3 inches by 3 inches when holding a ruler up to the computer screen. 

    Once I enlarged the image in Paint, I easily saw that a ground brick was made up of a 16 x 16 grid. I put my ruler up to the screen and measured the distance for each grid block to determine the size of my gridlines on the poster board.

    This grid allowed me to easily draw all the shapes and items needed to create Super Mario Bros. World 1-1

    Picking the Paint Colors for Your Mario Bros Wall Mural

    mario walls

    We printed enlarged portions a high-quality image of World 1-1 and matched them to paint samples at Wal-Mart. 

    I purchased all of the paints we used at Wal-Mart. We used the Color Place brand (for most of the paint) of flat paint because it was the cheapest per gallon.

    It might not be the best quality, but we did not have the money to spend on top-quality paint, especially when we had to buy gallons and gallons of paint. I think the paint we used turned out just fine!

    If you want to use the exact paint colors we did, here are the paint codes you can take into Wal-Mart to achieve them.

    Black: Basic Premixed Flat Black

    Dark Green

    1. KX 1Y 16
    2. AXX 9Y 15
    3. D 27 ½
    4. E 38

    White: Basic Premixed Flat White

    Brown: “Orange Sienna” Better Homes and Garden’s Interior Flat

    Highlight White: “Flowering Baby’s Breath”

    1. C 2
    2. L 6
    3. R 4

    Orange: “True Royal Love”

    1. KX 3Y 24 ½
    2. AXX 7Y 19
    3. L 15
    4. V 37

    Light Green

    1. KX 3Y 33
    2. AXX 7Y 30 ½
    3. D 11 ½
    4. E 20 ½

    Gold

    1. KX 1Y 14 ½
    2. R 37
    3. T 9Y 44 ½

    Sky Blue: “Blue Sausalito Bay”

    1. B 22
    2. D 2
    3. E 2Y 38

    Red: Sorry, for some reason, we don’t have a name or color code for the red paint.

    Painting a Mario Bros Wall Mural


    Painting has to be the most fun part of this project other than seeing the finished product. 

    Mario Wall Mural Height

    mario

    The first thing you need to do is determine how high on the wall you need to start the mural to keep the proportions.

    I took my basic block and determined how many blocks high the world was. I determined that it would be about 12 blocks high or about 6 feet.

    In the room that I was painting, the walls were 9 feet high, so I started my ground bricks about 3 feet from the ground.

    Next, I measured around the room, making marks 3 and 4 feet off the ground. I used a chalk line to make straight lines at the three and 4-foot marks.

    I then put painter’s tape right above the 3-foot line and just below the 4-foot line around the entire room. All of the areas above the 4-foot line were painted sky blue, and the area below the 3-foot line was painted black.

    Note: You don’t have to paint the bottom half of the room black if you don’t want to. We choose black to make the rest of the world pop.

    After the black and the sky blue areas dried, I then placed painter’s tape just below the 3-foot line and just above the 4-foot line. I then painted the space in between this tape brown.

    Once the brown area dried, I covered all of it with painter’s tape. After covering the brown area with tape, I begin to draw out the squares for the ground bricks.

    Outlining and Using the Mario Bros Wall Stencils

    mario mural

    Using my ground brick stencil, I placed it on top of the painter’s tape and traced it around the outside. I repeated this step until I created the outline of all of the ground bricks on the tape.

    Next, I started to plan where I would place all of the other elements of the world. Looking at my original picture and using the ground blocks as a guide, I started to put the elements that appeared in the sky blue area first, but you may start wherever you like.

    After locating the general area for an element, I would cover that small area with painter’s tape and trace the outline of each item on the painter’s tape.

    mario wall

    Then I cut off one part of the stencil and went around to every block where that item would be placed to trace the element’s new piece. After I updated all of the elements on the wall, I then cut out a little more of the shape and traced that part onto the proper area on the wall.

    I continued with this process until I went through all of the stencils and copied them onto their proper spot on the wall. This resulted in all of the stencils being drawn on the painter’s tape.

    Painting the Other Elements in Your Mario Mural

    mario room

    The next step is to start painting each of the elements on the wall. I picked an element and found the innermost section of the drawing. I used a razor knife to cut out this shape and remove the tape exposing the wall.

    Then I painted the proper color on the newly exposed wall. Work your way around the room exposing one piece of each element at a time, and then paint it.

    Warning: You will be finding bits of painter’s tape for a long time and throughout your house. It gets stuck to socks and whatnot.

    Once the paint dries, you can start removing the next portion of the tape using a razor knife and start painting it. You will remove the tape and start painting from the inside out of every element until you complete all the details to finish the mural.

    Final Touches to Complete Your Mario Bros Bedroom

    mario room

    Once the room was complete, I added some finishing touches like a Mario lamp, bedding, Mario figures, and pops of green.

    We painted some old shelves and dressers the same color as the small and large bushes that are in the mural, bought green valances, and even got my son a big green fuzzy pillow (he loves soft things) so that the green would be his room’s accent color.

    This whole process took about four months to do, so it is not a quick project by any means. Granted, this was painted after work and on weekends only. The result was more than worth it, though!

    How do you have your child’s room decorated?

  • 7 Easy Ways to Rejuvenate Your Garage

    7 Easy Ways to Rejuvenate Your Garage

    7 Easy Ways to Rejuvenate Your Garage

    You’ve spent hours toiling in your garage, but are you using your space as efficiently as possible? Here are just seven ways to remodel, revamp, and rejuvenate your workspace.

    1. Replace Your Garage Doors

    Are you still struggling with the garage doors that came with the house? Are they old, outdated, or supremely slow? Replace them with a sleek new model with contemporary features like wireless keypads and remote locking capabilities.

    We just built a house, and garage door openers were not included.

    Remember, if you have two separate garage doors, places like Lowes and Home Depot want to charge you around $120 for the installation per door on top of the price of each opener.

    Craziness!

    So keep that in mind when you are budging for them. My husband was not a happy camper when he found out.

    2. Install Cabinets

    Garage cabinets are a great way to get things off the floor. You can stick everything from tools to half-finished projects inside them, not only improving your workspace organization but also freeing up room to move.

    We saw some stock cabinets at Home Depot that we plan on putting in our garage one day. They are meant for a pantry usually, but we think two would go great in the garage for tools and whatnot. We are notorious for having a junked-up garage, but it stops now!

    3. Jazz Up Your Flooring

    Say goodbye to that stained concrete that makes the entire place look messy and unkempt. Install something like epoxy, tile, or limestone instead.

    You can even paint your floor with stripes or checkers to give it the feel of a real auto shop.

    4. Let There Be Light

    Florescent lights are critical to the modern garage, but did you know that you can save up to $100 a year by switching to compact fluorescent lights (CFLs)?

    They’ll shine just as brightly as your regular halogen bulbs, but they’re much more energy-efficient and cost-effective.

    5. Upgrade Your Workbench

    If your workbench doesn’t have wheels, it’s time to add them. If it doesn’t include built-in shelves and compartments for holding your tools when not in use, it’s time to look at models that do. Your workbench is the life and soul of your garage, so find something worthy of the title.

    Half of our garage will be used as a workshop. My husband is into woodworking these days with all my Pinterest finds. Against one wall, there will be the pantry-type cabinets on the ends of the rolling workbench we saw at Home Depot. We are at Home Depot A LOT these days if you can’t tell.

    6. Use Your Ceiling


    All kinds of things can be attached to your ceiling to help you organize your garage and free up floor space. For example, hooks can hang little baskets of nails, and steel bars can hold plastic bins full of holiday decorations and sports equipment.

    7. Write It Down

    Does your garage have an area where you can jot down ideas in the middle of a project? Most don’t, and the ideas of their owners are lost forever. Make it a point of installing a few whiteboards, chalkboards, or bulletin boards around your garage so inspiration never goes to waste. You can even make a chalkboard by spraying an old mirror with chalkboard paint.

    Bonus: Change Up the Walls

    Alright, so when it comes to garages, chances are, the last thing you’re thinking is making it appear aesthetically pleasing. Sure, minimizing clutter and making the garage organized can make it look fantastic, but it’s not really going to be enough.

    So, one of the best things you can consider is changing up the walls in a sort of way. This could be adding a nice peg board on top of your workbench, adding some shelving, or maybe even giving the walls a nice paint job.  

    But when it comes to rejuvenating your garage or your workshed in general, you don’t have to be limited to just adding some accessories or painting; you can even find out what the difference is between cedar and pine as you can even add these to your walls for a more unique and cozy feeling to the garage too. In general, you don’t have to settle for a boring garage; add what you want to the walls!

    These are just seven (well, eight) ways to revamp your musty garage. From spotless floors to effortless organization, you won’t even recognize your man cave after you’ve taken all these tips to heart.

  • The Battle Over Snow Removal Equipment Continues

    The Battle Over Snow Removal Equipment Continues

    The Battle Over Snow Removal Equipment Continues

    After the first winter storm hits, you may be trying to decide if you want to keep using your old snow shovel or invest in a snowblower for winter snow removal. Whether you’re jealous of your neighbor across the street who cleared their driveway in half the time it took you, or you’re a recent empty-nester with no teens to help you clear the driveway, now might be the time to purchase a snowblower.

    Learn more about the benefits of using a snowblower over a snow shovel as well as snowblower maintenance, to decide if power snow removal equipment is what you want for your driveway.

    Advantages and Disadvantages of a Snow Shovel

    If you’re looking for a good workout at 5 AM on a wintery morning, a snow shovel is the right tool for you. You just may not want to have that workout every day, especially if you have an unexpectedly heavy snowfall that makes you late for a meeting.

    Plus, if you have health concerns or don’t use proper technique and stretch before and after you shovel, you could risk injury or heart problems.

    Snow shovels are great snow removal equipment for short driveways, decks, or pathways around your yard, but using a snow shovel on a long driveway or to clear heavy snow keeps you outside for an hour or more after each snowfall. It’s definitely a chore.

    This often means getting up early to get it removed before work and sometimes removing it again between work and dinner. If you are using a snow shovel, you’ll also need to stay hydrated, rest frequently and wear layers so you can stay warm without overheating.

    But, if you live in an area with light and infrequent snowfall, a snow shovel maybe your best option based on ease of storage and affordability.

    Benefits of a Snow Blower


    Snowblowers do have two disadvantages when compared to snow shovels. They’re more expensive, and they require annual maintenance to keep them up and running.

    However, snow blowers are better for your back, better for your heart, and they reduce the time you’re out in the cold. The speed and efficiency of a snowblower mean you can get out and get the driveway cleared quickly before work or holiday visits (even if you wake up to a few unexpected inches).

    Plus, they require much less physical exertion than snow shovels, and you can order snowblower accessories like snow cabs, tire chains, work lights, skid shoes, and drift cutters to make your job even easier.

    So, if you often receive a heavy, wet snowfall over four inches, have a long driveway, are older, have health concerns, or just want to spend more time with family and less on chores, a two-stage snow blower is a better choice than a snow shovel.

    Despite the higher price point and necessary snowblower maintenance, properly cared-for power snow removal equipment lasts for years and cuts down the time and energy it takes to clear your driveway.

    The ease of clearing snow with power snow removal equipment might even prompt you to clear your sidewalk or neighbor’s driveway. Who knows, you might get some cookies in return!

    Snow Blower Maintenance Tips

    To keep your machine in pristine condition, make sure you do routine snowblower maintenance each fall. Change the oil, check the oil and air filters, change spark plugs, inspect belts, tighten bolts and lubricate parts to ensure your power snow removal equipment is ready for old man winter.

    Do this early enough in the fall to order replacement snowblower parts for the upcoming season if necessary.

    Before each use, makes sure your snowblower has a full gas tank. Since the machine needs to be cool before refueling, you don’t want to be in the middle of the driveway when you have to stop and wait.

    Snow Removal Tips When Using a Snow Blower


    Before your first major storm with a new snowblower, do a test start to make sure everything is running smoothly. Spray the chute with a non-stick spray to reduce the chance that thick snow will clog it up, and never use your hand to unclog the chute, or try to unclog it while it’s running.

    When removing snow with a snowblower, be sure to clear the path of any objects that could damage the machine or your property if they are picked up by the snowblower. Finally, when using the snowblower, clear snow up and down the driveway rather than across it, and avoid using it on steep slopes. Stay warm!

    Do you have snowy winters where you live?